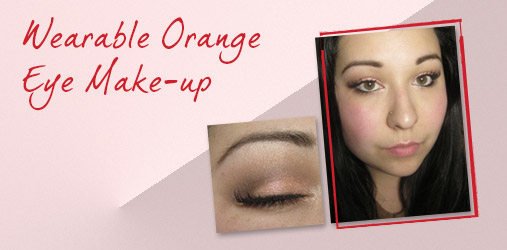
If you follow makeup trends you’ve probably noticed that orange is one of the hottest cosmetic colors this spring/summer season. While many color-enthusiasts love working with this fun, eye-catching shade, there are also many out there wondering—is it wearable for me? Personally, I think it is! Whether you’re a little color-shy or simply concerned it won’t work well on your skin tone, I think almost any color can be made wearable through proper application and the right complementary products and colors. I’ve created this “wearable” orange eye look to help anyone that wants to get their feet wet so to speak when it comes to wearing orange on their eyes. In my opinion, if you couple a seemingly “un-wearable” color with neutral, complementary shades you can often make almost any color work for you!
What you’ll need (I’ve included what I used in parentheses): Orange eyeshadow (mixed MAC Pink Opal with Fyrinnae Electro-Koi Medium Chocolate Brown matte eyeshadow (MAC Texture) Dark Brown matte eyeshadow (Make Up For Ever #17) Light Taupe matte eyeshadow (Inglot #358) Ivory eyeshadow (Inglot #395) Black eyeliner (Mirenesse Inside Out 27HR Kohl in Osiris) False lashes and/or Mascara (Faux lashes in Colette and Revlon Grow Luscious mascara in Blackest Black).

I always recommend starting out with a clean, moisturized, and primed eye. I personally like Benefit Stay Don’t Stray for many of the daily eye looks I create unless I’m working with loose pigments, but use whatever works best for you.
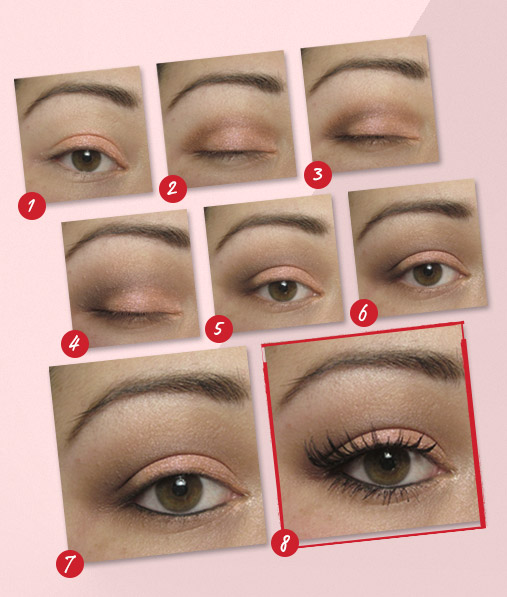
Step 1: Pat orange shadow on 2/3 of your upper lid working from the inner corner out. Sweep a little under the inner lower corner as well.
Step 2: Create a “C” shape with a medium chocolate brown shadow that frames the orange shadow by starting at the outer corner of your upper lid with a sweeping motion up and around the crease towards the inner corner.
Step 3: Use a dark brown shadow to darken the outer “V” of your upper lid and create more depth. With a light hand, sweep this shade under your lower lashline as well.
Step 4: Using a super light brown or light taupe, blend out the edges of the crease color up towards your orbital bone. Sheer it out as you blend upwards towards your brow.
Step 5: Using a cream or ivory colored eyeshadow, highlight right below your brow and the inner corner of your eye with a light hand.
Step 6: Make sure you blend in the ivory eyeshadow so it catches the light, but doesn’t create a stark contrast.
Step 7: Tight-line or line your upper lashline in a manner that best defines your eye and line your lower lashline.
Step 8: Curl your upper lashes and apply mascara and/or falsies. Remember to apply mascara to your lower lashes as well.
Voila! A wearable orange eye look! If this is your first time working with orange eyeshadow don’t worry if you’re not completely thrilled with your first attempt! Practice makes perfect and half of perfecting how to apply shadow in general to your eye is simply doing it over and over. Good luck!
By Doria Murphy Freelance Makeup Artist and Beauty Blogger at BeautyPopStop.com Beauty Blog