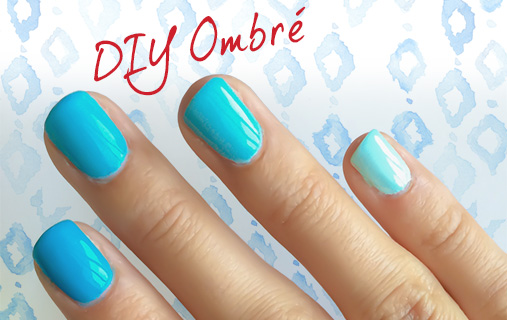
Hi there! I'm Danielle from For the Love of Leopard, a Fashion Blog that chronicles my daily outfits. I'm so excited to be guest blogging here at Remington Ready. Today I'm going to show you how to achieve an ombre manicure at home. And let me tell you, it is as easy as can be!
Here's what you'll need:
* Base coat (I like Gelous - you can get it on Amazon)
* Bright summer hue (I'm using Essie "I'm Addicted")
* Any white nail polish
* Wax paper
* Bobby pin
* Fast dry topcoat (my absolute favorite is Seche Vite)
1. First thing you want to do is create the perfect canvas for your nail polish, so give them a quick swipe with nail polish remover to remove any oils so the polish really sticks.
2. Start with a thin coat of your base and allow it to fully dry.
3. Apply your bright summer hue (in my case, Essie "I'm Addicted") to both of your thumbs. This is going to be the darkest shade of your manicure.
4. Using the nail brush place about 5-6 drops of your bright hue onto the wax paper. Then add one drop of your white polish to the bright hue and mix thoroughly using your bobby pin. You will now have a slightly lighter shade of your bright hue. Apply to both of your pointer fingers
5. Place another drop of the white polish into the existing polish on the wax paper and mix thoroughly. This should be two shades lighter than your original color. Apply to both of your middle fingers.
6. And so on and so forth - keep adding drops of white and mixing into the existing polish, creating a slightly lighter color with each white drop. You're most likely going to have to do another coat, so just follow the same process as above, with a new batch of color.
7. Finish off with a swipe of fast dry topcoat and enjoy all the compliments you will receive on this mani!
To read more of Danielle's beauty and fashion secrets head on over to For the Love of Leopard!